iPhone 14 Pro: How to Screen Record with Sound
The ability to capture and share your screen has become an essential tool for communication, education, and entertainment. With the release of the iPhone 14 Pro, Apple has continued to push the boundaries of what a smartphone can do, and one of its standout features is the ability to screen record with sound. Whether you want to create a tutorial, share a funny moment from a game, or troubleshoot an issue with tech support, knowing how to screen record with sound on your iPhone 14 Pro is a valuable skill. In this comprehensive guide, we will walk you through the step-by-step process of screen recording with sound on your iPhone 14 Pro.
Why Screen Recording with Sound Matters
Screen recording on a smartphone is not a new concept, but adding sound recording takes it to a new level. With sound, you can provide context, narration, or commentary to whatever you’re recording, making it a powerful tool for content creators, educators, and anyone who wants to share information effectively. Here are some scenarios where screen recording with sound can be incredibly useful:
1. Tutorials and How-To Guides
- Create step-by-step tutorials on how to use apps, features, or settings on your iPhone 14 Pro.
- Teach others how to troubleshoot common issues by recording the problem and providing a solution.
2. Gaming
- Record your gameplay and add commentary to share your gaming experiences with others.
- Showcase your skills, strategies, and tips for specific games.
3. Bug Reporting and Tech Support
- Capture and record software bugs or issues to send to developers or tech support.
- Provide detailed demonstrations of problems you encounter to get more accurate assistance.
4. Presentations and Demos
- Record presentations, product demos, or business proposals to share with colleagues, clients, or investors.
- Include your voice to provide context and explanations during the presentation.
5. Content Creation
- Record and edit video content for YouTube, social media, or other platforms, incorporating your screen and voice.
- Engage your audience with dynamic visual and auditory content.
Preparing your iPhone 14 Pro for Screen Recording
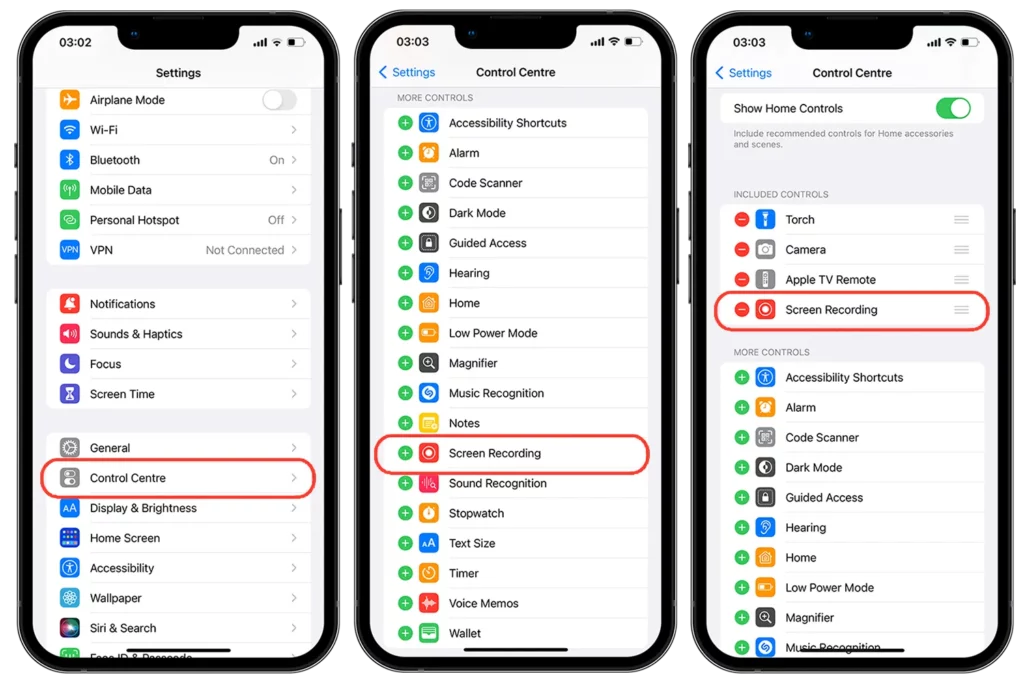
Before you start screen recording with sound on your iPhone 14 Pro, you must ensure your device is set up correctly. Here’s a step-by-step guide to help you get started:
1. Update your iOS
- Ensure your iPhone 14 Pro is running the latest version of iOS. Apple regularly releases updates that may include improvements and bug fixes for screen recording.
2. Enable Screen Recording in the Control Center
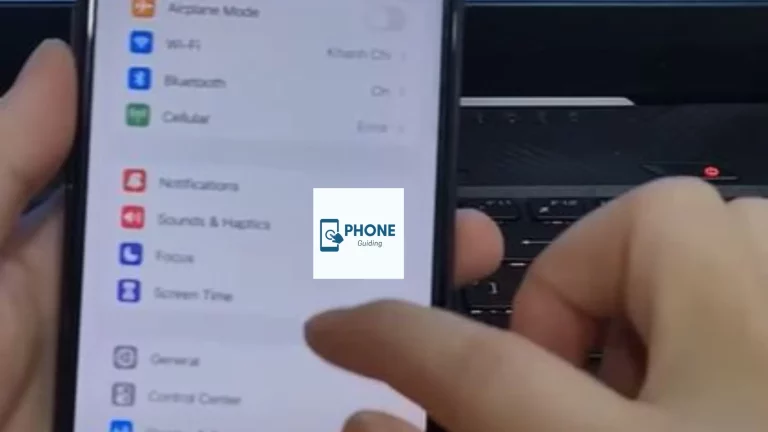
- Go to Settings > Control Center.
- Tap “Customize Controls.”
- Find “Screen Recording” and tap the green “+” icon to add it to your Control Center.
3. Check Sound Settings
- Go to Settings > Sounds & Haptics.
- Ensure that the “Change with Buttons” option is turned on to adjust the recording volume during the screen recording.
4. Adjust Microphone Settings (Optional)
- If you plan to include your voice in the recording, go to Settings > Privacy > Microphone.
- Enable microphone access for the apps you intend to use for screenrecording.
- With these preparations complete, you’re now ready to start screen recording with sound on your iPhone 14 Pro.
How to Screen Record with Sound on iPhone 14 Pro
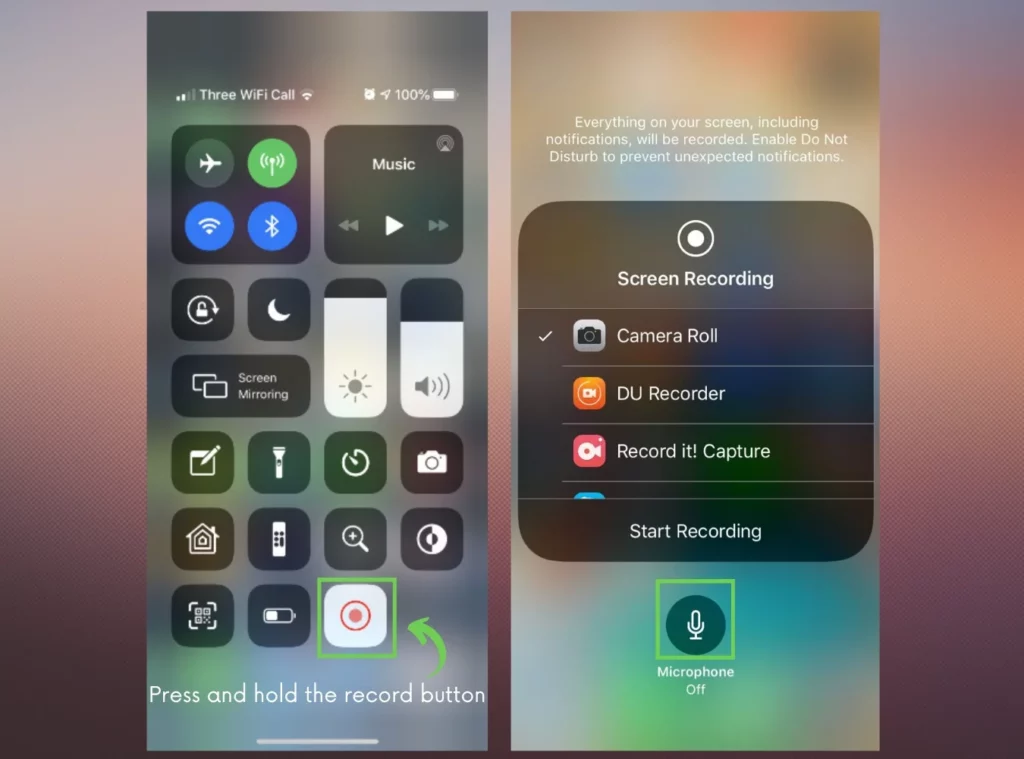
Now that your iPhone 14 Pro is set up correctly, let’s walk through the steps to screen record with sound:
1. Open Control Center
- Swipe down from the upper-right corner of your iPhone 14 Pro to open the Control Center.
2. Start Screen Recording
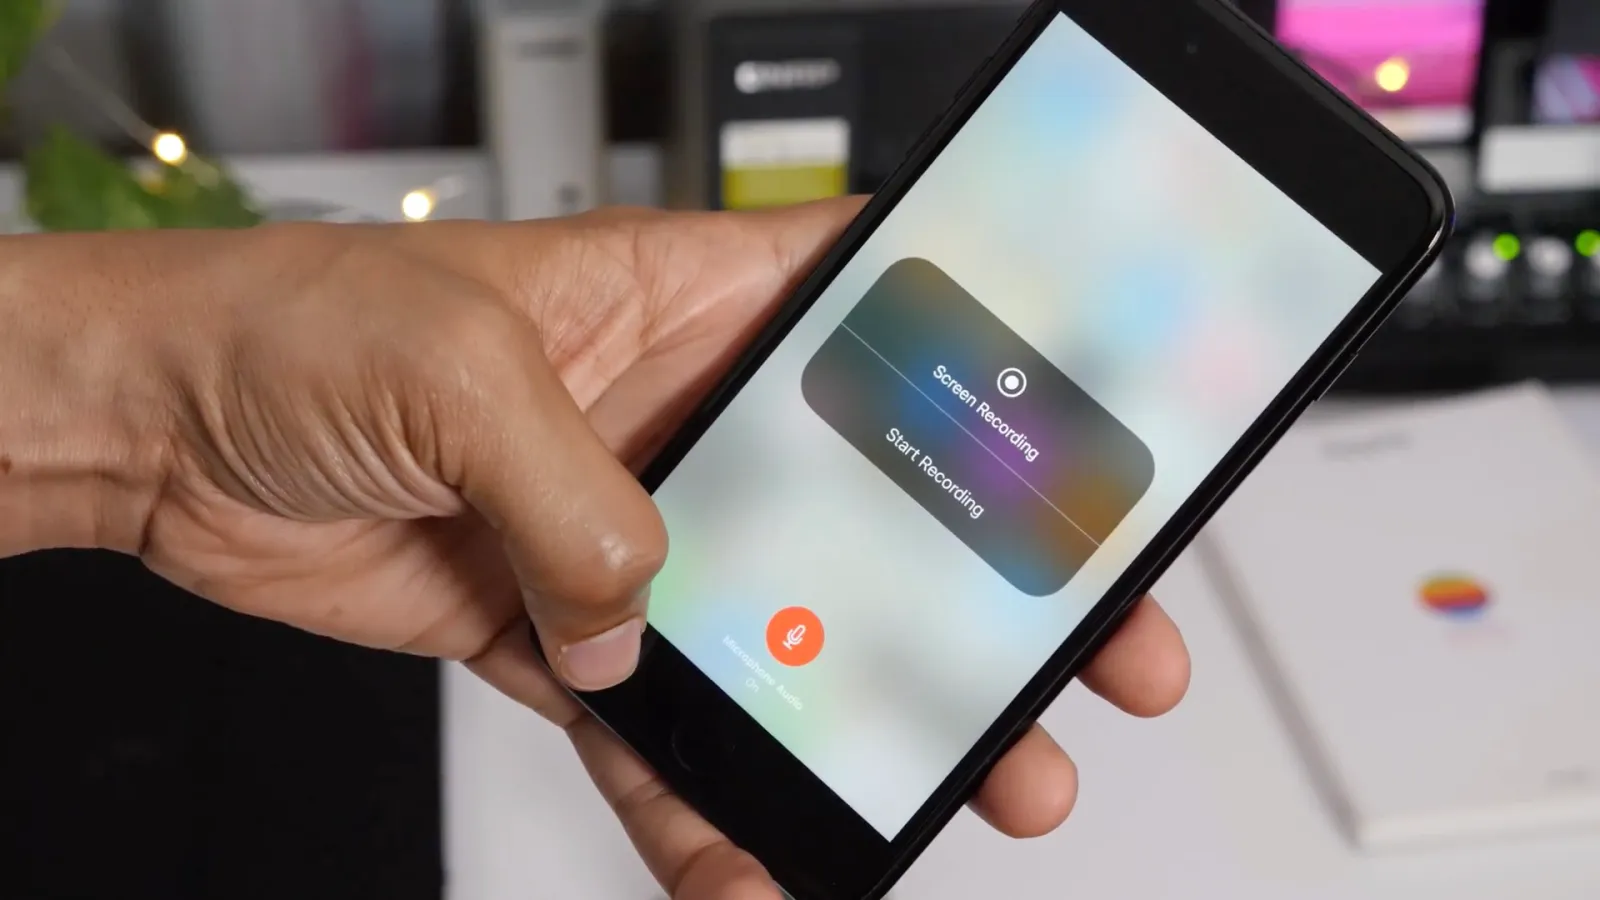
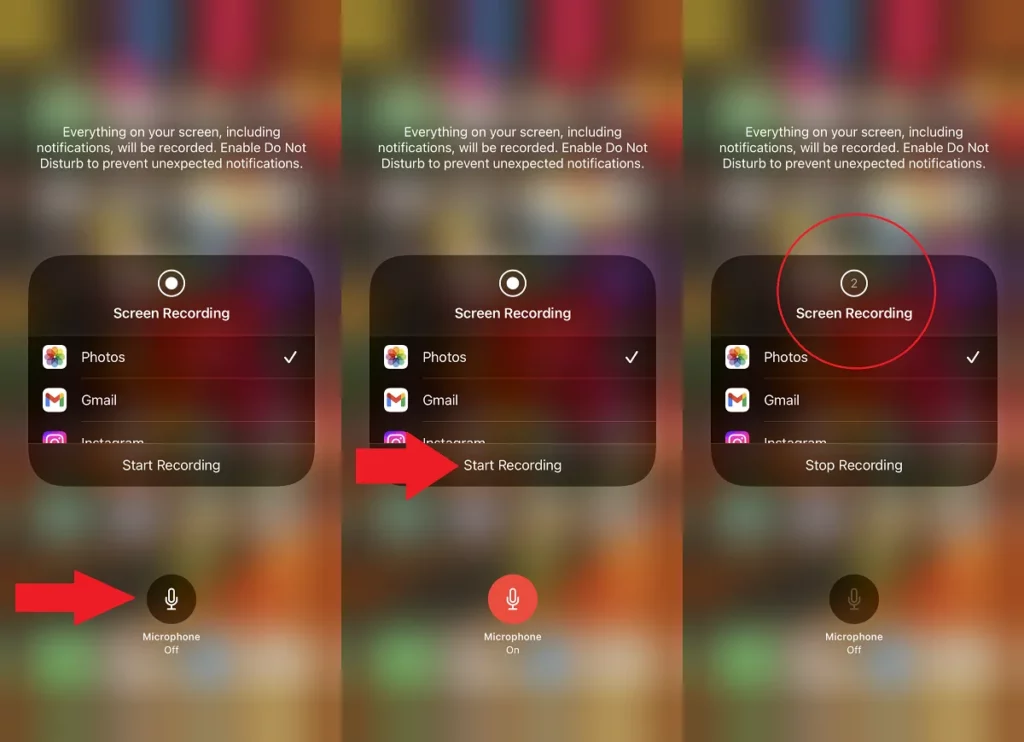
- You will see a “Screen Recording” icon in the Control Center. It looks like a circle inside another circle.
- Press and hold this icon until you see a menu that includes a microphone icon.
3. Enable Microphone Audio
Tap the microphone icon to turn on the microphone audio. This allows your iPhone to record the screen and any sound picked up by the microphone.
4. Start Recording
- Tap the “Start Recording” button. You’ll see a countdown timer indicating when the recording will begin.
5. Record Your Screen
- Once the countdown finishes, your iPhone 14 Pro will start recording everything on your screen, along with any sound coming through the microphone.
- You can navigate your device and interact with apps while recording.
6. Stop Recording
- To stop the recording, tap the red status bar at the top of your screen. A confirmation prompt will appear, asking if you want to stop the recording.
- Tap “Stop,” and the recording will be saved to your Photos app.
7. Access and Edit Your Recording
- Your screen recordings are in the Photos app under the “Recents” album.
- You can edit the recording, trim it, add captions, or share it with others.
Tips for Successful Screen Recording With Sound
To make the most of your screen recording efforts, consider the following tips:
1. Use a Quiet Environment
- Recording in a quiet space minimizes background noise and ensures clear audio commentary.
2. Use External Microphones
- Consider using an external microphone connected to your iPhone 14 Pro for professional-quality audio.
3. Plan Your Recording
- Outline what you want to cover in your recording to avoid unnecessary pauses or confusion.
4. Record in Landscape Mode
- Record your screen in landscape mode for a more visually appealing result.
5. Edit Your Recordings
- After recording, use video editing apps to enhance your content by adding text, annotations, or music.
6. Practice
- If you’re new to screen recording with sound, practice a few times to get comfortable with the process.
Troubleshooting Screen Recording Issues
While screen recording on your iPhone 14 Pro is relatively straightforward, you may encounter some issues. Here are common problems and solutions:
1. No Sound in Recordings
- Ensure the microphone is enabled in the Control Center before starting the recording.
- Check your microphone’s physical condition and clean it if necessary.
- Restart your iPhone and try again.
2. Low Volume or Poor Audio Quality
- Adjust the microphone volume in the Control Center before recording.
- Use an external microphone for better audio quality.
- Eliminate background noise by recording in a quieter environment.
3. Large File Sizes
- Screen recordings can result in large files. To reduce file size, consider using video editing apps to trim unnecessary portions or compress the video before sharing it.
4. Recording Stops Unexpectedly
- Ensure you have sufficient storage space on your device.
- Check for software updates, as they may resolve stability issues.
Conclusion
Screen recording with sound on the iPhone 14 Pro is a versatile feature that can benefit various aspects of your digital life, from creating engaging content to troubleshooting problems and educating others. By following the steps outlined in this guide and implementing the provided tips, you can harness the power of screen recording to its fullest extent. As technology continues to evolve, Apple’s commitment to enhancing the user experience ensures that the iPhone remains at the forefront of innovation, making it an excellent tool for screen recording and so much more. So, start sharing your knowledge, experiences, and creativity with the world through your iPhone 14 Pro screen recordings. Happy recording!
