How to Make an Emergency Call on Your iPhone: A Step-by-Step Guide
Your iPhone is not just a device for communication and entertainment; it can also be a lifeline during emergencies. Knowing how to make an emergency call on your iPhone can save precious time and potentially save lives. Whether in a medical emergency, an accident, or any situation requiring immediate assistance, your iPhone can quickly connect you to emergency services. In this comprehensive guide, we will walk you through the steps to make an emergency call on your iPhone and address some frequently asked questions related to emergency calls.
Making an Emergency Call on Your iPhone
In an emergency, the last thing you need is uncertainty about how to call for help. Fortunately, Apple has made it simple to dial emergency services quickly on an iPhone. Here’s how you can do it:
Wake up the iPhone:
If your iPhone is locked or in sleep mode, you must wake it first. Press the side button (located on the right side of the iPhone) or the Home button (for models with a physical Home button) to wake the device.
Access the Emergency Call Screen:
You’ll see an “Emergency” option in the bottom left corner of the lock screen. Tap on it to access the Emergency Call screen.
Dial the Emergency Number:
You can dial the emergency number specific to your country on the Emergency Call screen. For most regions, including the United States, the emergency number is 911. In the European Union, it is 112. For other countries, know the appropriate emergency number in advance.
Initiate the Call:
After dialing the emergency number, your iPhone will immediately call the emergency services. The call will connect even if your iPhone is locked, and you can communicate with the emergency operator to explain the situation and request assistance.
Enabling the Emergency SOS Feature on Your iPhone
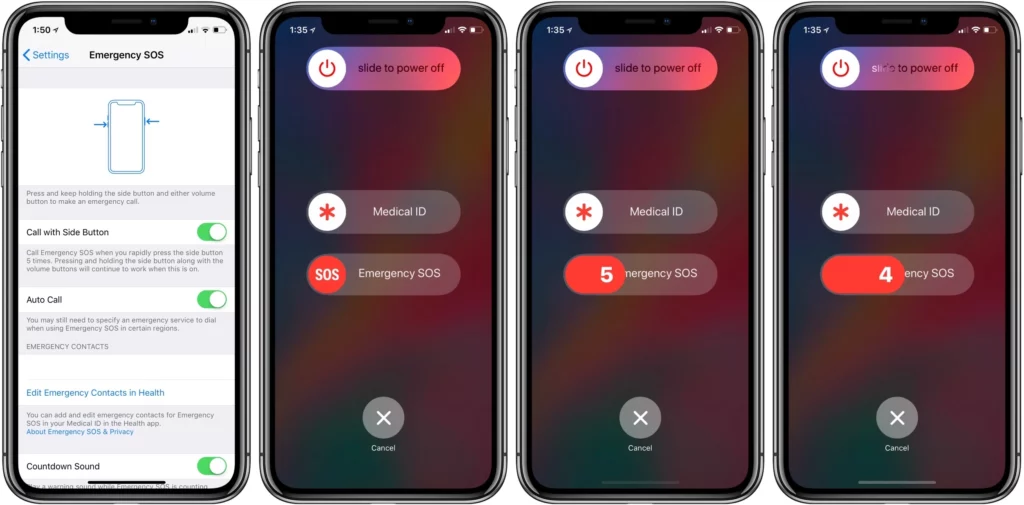
Apple introduced the Emergency SOS feature with iOS 11 to make it even easier to call emergency services. This feature allows you to make an emergency call by pressing a combination of physical buttons. To enable Emergency SOS on your iPhone, follow these steps:
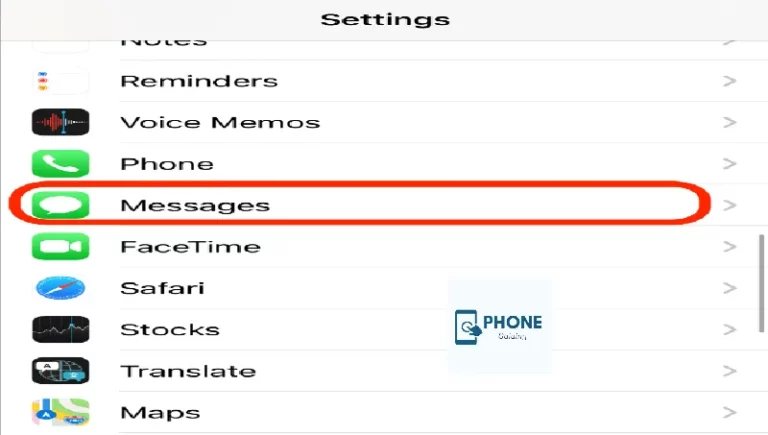
Open Settings:
Go to the Settings app on your iPhone.
Access Emergency SOS:
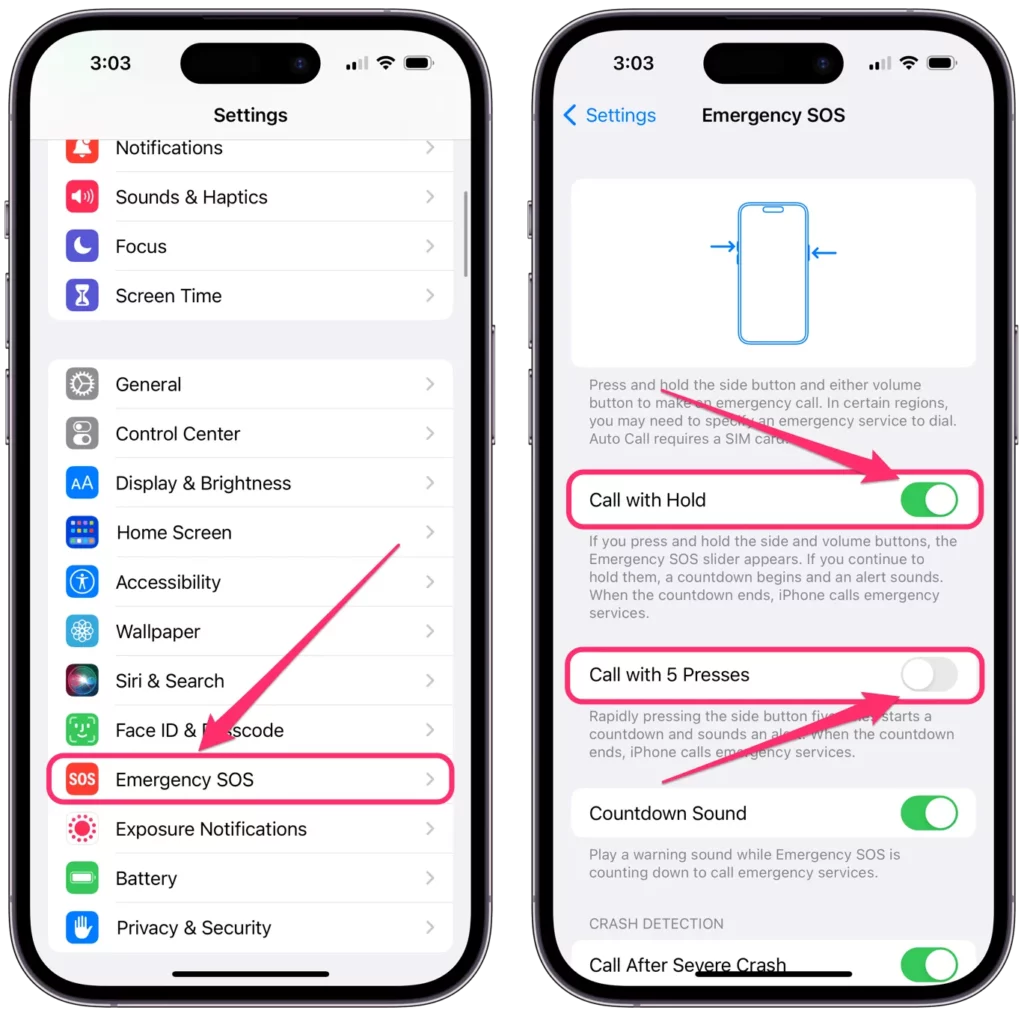
In the Settings app, tap “Emergency SOS,” usually located near the top of the list.
Enable Auto Call (Optional):
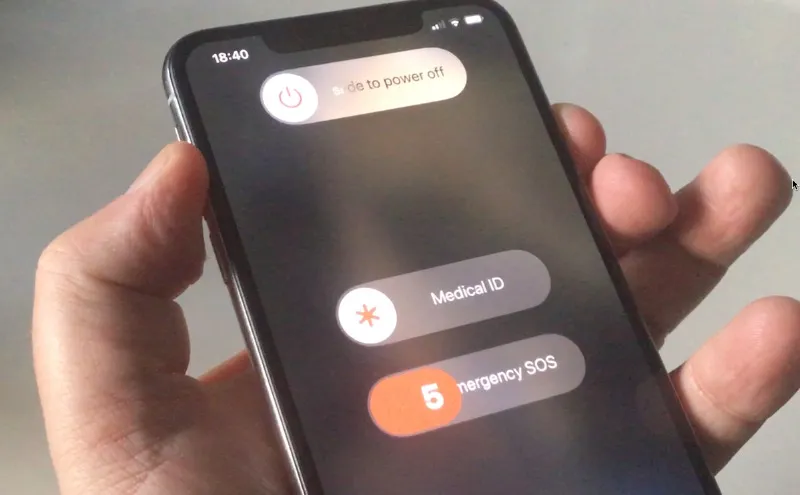
In the Emergency SOS settings, you’ll find an option called “Auto Call.” When enabled, your iPhone will automatically call emergency services if you rapidly press the side button (or the power button) five times in quick succession. Consider enabling this feature for faster access to emergency assistance.
Set Emergency Contacts (Optional):
You can also set up emergency contacts in the same Emergency SOS settings. When you initiate an Emergency SOS call, these contacts will receive a message with your current location. This can be useful for notifying loved ones about your situation.
How to Add an Emergency Contact on Your iPhone
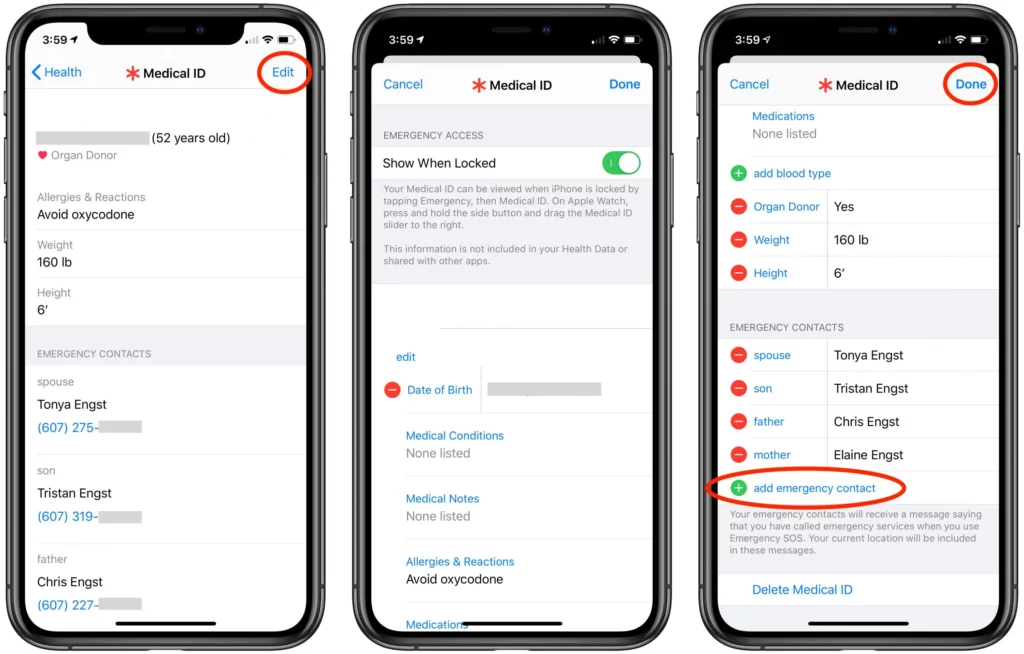
Adding an emergency contact on your iPhone is a smart and responsible step, as it allows medical personnel and first responders to access crucial information about you in an emergency quickly. Adding an emergency contact ensures that your loved ones can be notified promptly if you cannot communicate. Here’s a step-by-step guide on how to add an emergency contact on your iPhone:
Open the Health App
The Health app comes pre-installed on iPhones and is typically represented by a white icon with a red heart. Locate and tap on the Health app icon to open it.
Set Up Your Medical ID
Once inside the Health app, tap on the “Medical ID” tab in the bottom right corner of the screen.
Create Your Medical ID (if not already set up)
If you have not previously set up your Medical ID, you must create one before adding an emergency contact. To do this, tap “Create Medical ID” in the top right corner of the screen. You will then be prompted to fill in your personal information, including name, birthdate, medical conditions, allergies, and other relevant details.
Add an Emergency Contact
In the Medical ID section, scroll down to the “Emergency Contacts” section and tap “Add Emergency Contact.”
Select a Contact
You will now be able to access your iPhone’s contacts list. Browse your contacts and select the person you want to designate as your emergency contact. If the person you wish to add is not already in your contacts, tap “Create New Contact” to add their details.
Choose a Relationship
Once you’ve selected the contact, you will be asked to choose their relationship to you from a list of options such as “mother,” “father,” “friend,” or “spouse.” Pick the most appropriate relationship and tap “Done” to save the contact.
Add Multiple Emergency Contacts (Optional)
If you want to add more than one emergency contact, repeat steps 4 to 6 until all the contacts you wish to include are listed in the Emergency Contacts section.
Enable “Show When Locked”
To ensure your emergency contact information is accessible even when your iPhone is locked, toggle the “Show When Locked” option at the top of the Medical ID page.
Save Your Changes
After adding the necessary emergency contacts, scroll to the bottom of the Medical ID page and tap “Done” to save your changes.
Test the Emergency Contact Feature (Optional)
Once you’ve added your emergency contacts, you may want to test the feature to ensure it works as intended. Lock your iPhone and then wake it up. On the passcode entry screen, tap “Emergency” in the bottom left corner. Next, tap “Medical ID,” you should see the emergency contact(s) you added.
Congratulations! You have successfully added emergency contacts to your iPhone’s Medical ID, making it easier for first responders to access important information in case of an emergency.
Note: Make sure that the people you add as emergency contacts know your decision and are willing to be contacted during emergencies. Additionally, periodically review and update your Medical ID information and emergency contacts to ensure accuracy and relevance.
Conclusion:
Knowing how to make an emergency call on your iPhone saves lives during critical situations. Following the simple steps outlined in this guide, you can quickly connect with emergency services and get the needed assistance. Enabling the Emergency SOS feature can rapidly enhance your ability to call for help. Always keep your iPhone accessible and charged, as it might be your lifeline when emergencies strike. Stay safe, stay informed, and be prepared to act swiftly when the need arises.
Frequently Asked Questions (FAQs)
Can I make an emergency call without a SIM card?
You can still make an emergency call on your iPhone without a SIM card. Emergency calls are allowed by law on all mobile devices, regardless of whether they are activated or have a valid SIM card inserted. However, making an emergency call without a SIM card will not allow you to make regular calls or access data services.
What happens if I accidentally trigger Emergency SOS?
If you accidentally trigger Emergency SOS, don’t panic. When the Emergency SOS countdown starts (which is usually three seconds), cancel the call by tapping the “Stop” or “Cancel” button on the Emergency Call screen. You can also dismiss the emergency call by swiping away the slider if it appears on the screen.
Can I use Emergency SOS in other countries?
Yes, Emergency SOS works in other countries as well. It automatically dials the local emergency number of the country you are in. It’s crucial to be aware of the specific emergency number for the country you’re visiting, as it may differ from your home country’s emergency number.
Will Emergency SOS share my location with emergency services?
When you make an emergency call using the Emergency SOS feature, your iPhone automatically shares your current location with emergency services. This information is crucial for first responders to reach you quickly and efficiently.
Is Emergency SOS available on all iPhone models?
Emergency SOS is available on iPhone models running iOS 11 or later. This includes most iPhone models released from the iPhone 5s onward. However, older models that do not support iOS 11 or later versions may not have this feature.
